Shooting 1080p on 5D, editing on iPad.
Importing and editing on iPad2 1080p clips shot on our favorite DSLR without using a computer is now possible. Although some major limitations, it opens the door to thousands of possibilities for Apple’s tablet integration in the filmmaker’s workflow.
There has been much talk lately about the weaknesses of the iPad as a media consumption (as advertised by Apple) and creation (as we’re desperately trying to use it) device. The main drawback of the most famous tablet being, of course, its over-locked system, which won’t let us conveniently watch videos over 720p or use it as an external monitor, for instance (only solution so far: jailbreak).
As soon as I got an iPad 2, I tried to push the camera connection kit to its limits. If you are not familiar with the CCK: it is a USB adaptor for iPad (it also works with some iPods and iPhones) that lets you plug your camera to your iPad and import photos and videos directly on the iPad instead of transferring everything to your computer and then on your tablet. You can read a complete review of the CCK here with a nice walk-trough. The big limitation being that although I could import videos from my Canon 5D mark II into the photo library of the iPad, the native photo app cannot play the videos shot in a definition above 720p, and until recently, not a single app from the Appstore could see them (even if many apps can handle 1080p videos imported via iTunes, for instance).
I did a little workflow test the other day with clips I had shot in 640*480, and everything worked out fine:
ARVE Error: id and provider shortcodes attributes are mandatory for old shortcodes. It is recommended to switch to new shortcodes that need only url
This video was shot on 5D, imported in the photo library of my iPad2 via the CCK, edited with iMovie for iPad, graded with CameraFX for Video and uploaded with Vimeo for iPad.
So when I discovered another editing app, called « 1StVideo for iPad » (24€ on iTunes) and advertised as the only professional editing solution available on the iPad, I was quite excited: the description said it could handle 1080p videos. The support team didn’t know about videos from the 5D, so I chose to give it a try. And guess what, the app can see 1080p videos in the photo library, import them, play them, edit them (multitrack) and export them in several definitions up to 1080p, as long as you own an iPad2 (it cannot work on the first iPad).
- STEP 1:
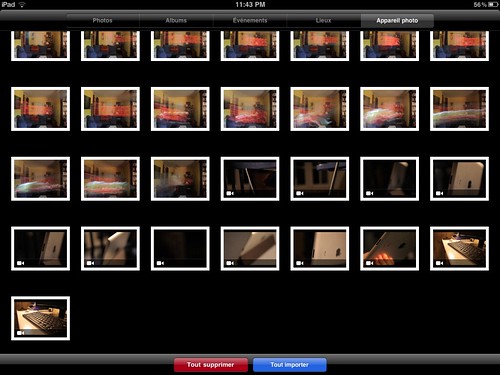
Plug your 5D to your iPad2 with the camera connection kit. The photo library will automatically let you select the photos and videos you want to import. The import time is a little under the total length of the rushes.
- STEP 2:
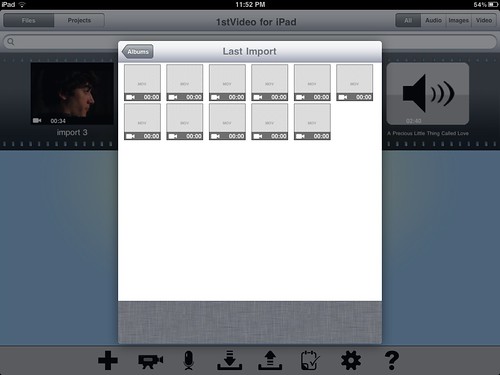
Open 1StVideo for iPad, hit the import button and chose « from libary ». Select the clips you need in your photo library. The tough part is that you cannot see thumbnails of 1080p videos: what you see is a grey square with « MOV » written on it. So you’d better know exactly what clips you imported and when, or just select all of them. The app does support batch importing. Hit « Done », and 1StVideo will let you write a title for the files before processing to the importation, which took me less than the total duration of the rushes.
- STEP 3:
You can now watch (and other basic stuffs like extract audio or rotate) any of the videos within the app. If all you need is checking your rushes while on set, you can stop there. However, you cannot edit the video now (see step 4).
- STEP 4:
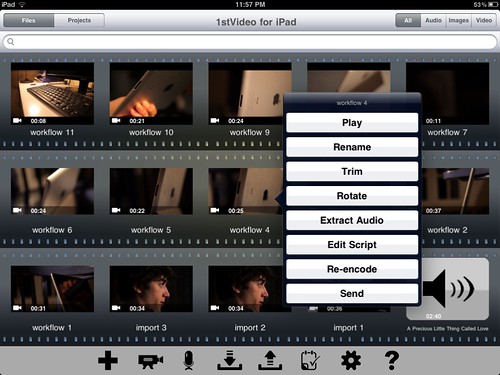
To use your videos in a project, you’ll have to re-render them. That’s the most fastidious part of the workflow since you cannot batch re-render, you have you have to do it video by video. Select the clip you want and hit « re-render » (see the above picture). The re-rendering time is more or less the time of your clip.
- STEP 5:
Open a project, and you can now edit your video. What I especially like with 1StVideo for iPad, apart from the 1080p functionalities, is that it allows you to smoothly edit on two video tracks and 4 audio tracks, and it’s far more precise than any other editing video on the iPad (Slice, ReelDirector, iMovie). The bad point is it’s not very stable: during my first test, the app kept crashing every time I tried to export until I found out that I needed to remove all the titles one by one and recreate them. The cool point is you can export in various settings, including a selectable definition and framerate.
Now here are three different versions of the test I did following these steps.
- The first one is the video exported in 1080p at the highest available bit rate. You’ll see that the compression is really visible in the burred out parts. This is NOT due to Vimeo, that’s how the source file is. I had to download the video on my computer (the app has a cool wireless way of doing it as long as your iPad and your computer are on the same network)
- The second one was exported in 720p in order to be watchable within the camera roll. I imported it with the Vimeo app directly from my iPad.
- The third one was exported in 720p and then graded with MovieLooks (the Red Giant app) in order to go as far as possible with the iPad and to get a DSLR video edited but also graded and uploaded without using any computer. The compression is quite bad here, since the 720p source file was already over compressed (see video 2) and MovieLooks is not quite as good as CinemaFX (iTunes link) when it come to compression. But I like their looks.
As you can see, we still have some serious limitations (numerous successive importations and re-rendering before being able to use the file, output file…) and each of us has to see for himself if the iPad is usable in his workflow in the current state. As for myself, I will definitely use it a lot:
- On light sets such as second unit work and the like, when no monitor and no computer is available, to double-check my shots (and the focus!)
- On set to make a point or test a transition
- Just after the shooting, while in the subway or while the lunch pause to quickly see what you can do with the coverage you have
- For structures or idea while in the subway or anywhere
- During castings: I have two casting sessions this week, I’ll will probably unload the most interesting candidates on my iPad to see them full screen as soon as possible and carry with me my collection of « best candidates » to be able to show them to the other persons involved in the project anytime.
- For improvised little movies or news work, closer to iPhone photography and mobile journalism than regular filmmaking: you see something worth shooting, you shoot it with you DSLR, edit it and upload it in a few minutes while still on location.


Hi!
I liked a lot your test and would like to know if this works with a NON jailbroken ipad2 🙂
Thanks, and YES, it does! The only point about a jailbroken iPad2 is that you don’t need 1StVideo for iPad to see the 1080p rushes.
Despite all the claims to the contrary I have been able to view 1080p footage (from a canon 550d) on a 1st generation i-pad in the standard viewer. It is a bit hit and miss in all honesty with some clips failing but the ability is there. Have also imported clips into Movie Looks and processed them.
I have not tried 1st Video so I cannot comment but there is a glimmer of hope for 1st Gen owners who fancy a gamble.
Some people are saying it doesnt import 1080p only 720 so just wanted to confirm it does? The reviews are very mixed and some very poor but if it can import the HD movies from my Lumix GH2 it will be worth the current reduced proce of £7.99.
It does import 1080p on iPad2. However, with iOS5, you can directly import 1080p clips directly to the native photo app. I guess this article needs an update 🙂